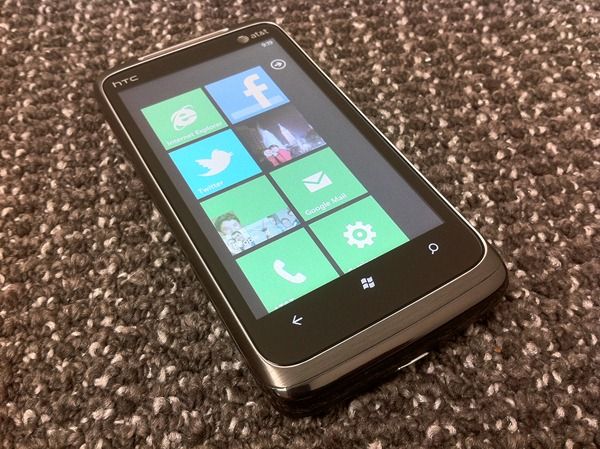
 Microsoft wants to get in on the modern mobile OS action, and after the inevitable fall of their previous version of Windows Mobile, Microsoft has sought to restart their mobile offering, thus Windows Phone 7 was born. The HTC Surround pairs WP7 with well-built hardware and an interesting approach to phone audio, but will Windows Phone 7 be able to catch on, or is it too little too late from Microsoft?
Hardware
Here’s a quick rundown of the HTC Surround’s specs, follow by a hardware tour of the phone:
- Windows Phone 7 OS (as reviewed, version 7.0.7004.0)
- Qualcomm QSD 8250 CPU @ 1GHz
- 576MB of RAM
- 8GB of built-in memory (no expansion)
- 3.8 inch capacitive touchscreen @ 800×480
- WiFi b/g/n & BT 2.1
- 5MP camera with single-LED flash (records up to 720p video)
- Slide out speaker with Dolby Mobile and SRS audio technology
- 165 grams (5.82 ounces)
Hardware Tour


Design
 Let me start by saying that the HTC Surround feels great in the hand. It’s been too long since I tested a phone that had some real heft to it (in a good way). Recent phones (cough*Samsung*cough) have left me with a feeling of cheapness. The Surround however feels like a premium device right out of the box.
 Metallic accents are found all around the phone . The front is a combination of brushed and polished metal and has a wide ear-piece that fits the look of the phone well. The back is rubberized much like the Droid X [review], and it has just a hint of metallic sparkles in it that you’ll see if you hold it in just the right light. The back is also home to a polished HTC logo, and above that is the 5MP camera and single-LED flash, both of which are encased in a metal accent piece with small radial ridges that emanate from the lens.
 But this is all before sliding the device open which reveals a speaker bar that comes about 1/3 of the way out of the side of the phone. I’ll talk more about the speaker bar below, but on the design side of things I wanted to mention that the sliding mechanism could be better. I’ve definitely seen/felt worse, but the Surround’s sliding mechanism could use a bit of work to make it slide more evenly and have less wiggle.
Despite the premium feel of the phone (considering the materials used and the weight of it), the buttons didn’t seem to receive too much attention. All physical buttons on the phone, except for the camera button, don’t provide very good feedback. It’s hard to tell when you’ve pressed the power/lock button. The volume rocker is a bit better with slightly more feedback, but the camera button is the only one that has enough “click inch for my taste.
 The bottom of the phone has a pry-slot to pull the back cover off, but it generally feels like you’re on the brink of ripping the phone into it’s two sliding halves. I haven’t found a good way to get the back cover off without stressing the sliding mechanism in a way that it wasn’t design to move. If you are a road warrior who relies on swapping batteries during road trips, be weary of this fact on the Surround as repeated removals could lead to breakage.
On general aesthetics of the device: I think it’s a good looking phone. When you make the investment to purchase a phone that will be with you for, perhaps several years, people should expect more than a piece of plastic. The Surround would feel even more solid if they rid it of the sliding segment, but despite this extra hardware, the Surround isn’t much thicker than many of it’s contemporaries.


")

")

")

")
")


")