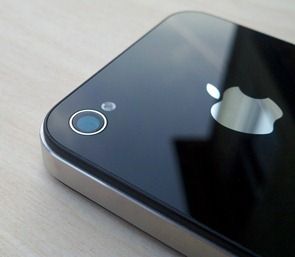
My apologies for not getting to this post sooner. Apple released a very cool HDR mode for the iPhone 4 with the iOS 4.1 update. As tempting as it was, HDR wasn’t enough to get me to jump on the upgrade right away and I instead decided to wait for 4.1 to be jailbroken. But now that iOS 4.1 has been freed of Apple’s restrictions and I’ve had some time to play with the iPhone 4’s HDR mode, I’d like to share with you some comparison photos and tips on get the most out of the feature.
First up, let’s talk about what HDR does and how it works on the iPhone.
HDR stands for High Dynamic Range. HDR photos fuse together shots of multiple exposures to get the most exposure detail out of a given scene. The idea is that in one shot, a static exposure could lead to a particular area of the photo being under-exposed (too dark), or over-exposed (too bright). By capturing multiple exposures and selectively combining them into a final photo, you can achieve a photo that is more realistic to what is being seen by the human eye as each part of the photo is exposed properly.
How does it work on the iPhone? I don’t have access to it’s inner workings, but from my testing, I have happily concluded that this is actual HDR, not simulated. I say “actual inch in the sense that the iPhone 4 is fusing multiple photographs into one, rather than taking a baseline shot and doing some post-effects to simulate HDR. The selection of the various exposures of each photo and the fusing/alignment of the photos together is all handled automatically; the algorithms that power this process are very good. Unless you are trying to capture moving subjects, you’ll probably never find a poorly fused or aligned photo.
Snapping a photo with the HDR mode takes barely longer than taking a regular photo which is very impressive. The aligning/fusing process takes just a few seconds after the shots are captured. There is a very high rate of return when it comes to quality shots because of how quickly each of the individual photos are captured. With a slower capture process, the HDR mode would be subject to any slight movements during the duration of the capture process. If Apple wasn’t able to make HDR photo capture this quick and have such a high return of properly aligned/fused photos, they wouldn’t have implemented the feature.
So what does it actually accomplish? Let’s take a look:

")

")

")

")
")

It’s important for me to note that most of the above examples are some of the more drastic ones that I’ve seen. You should be able to see how the improperly exposed areas are removed and replaced with properly exposed regions from other shots. The overall effect tends to be more natural looking photos with more accurate lighting and more detail revealed compared to under/over-exposed photos.
Apple isn’t usually one for options, but you can actually toggle to keep the original photo and the HDR shot in your photo roll if you’d like (you’ll find this options in the Settings app). This is handy because you can compare the two afterword and decided which you like best. I tend to leave HDR mode on all the time. The process is that quick and simple that it’s worth it to keep it turned on for every shot.
Knowing how to utilize HDR on the iPhone 4 can help you capture the most properly exposed photos. Here’s how I do it:
With HDR mode enabled, I use tap-to-focus (which focuses and adjusts exposure) to select the darkest park of the scene. This blows out anything that’s lighter than the darkest part, but the HDR mode seems to compensate better by decreasing exposure on the blown out portions of the scene (as opposed to increasing exposure on the darker/under-exposed parts). I used this technique on the first photo, which combined very dark and very light areas, in order to dramatically demonstrate HDR capabilities.
By recognizing this and using it to our advantage, it’s possible to take shots that capture photos that are exposed properly across all parts of the scene, and recreate a scene with much more detail and depth than is possible with a single photo. I hope to see similar implementations on upcoming competitor devices, but I’d be surprised if they were this good.


 Tablets increasingly seem to want to go from companion device to dedicated device, but there’s a lot of catching up to do in terms of productivity before that can actually happen. Today, most modern smartphones are capable of capturing 720p video, that means that if a tablet wants even a chance at being a standalone device, it’s going to need to at least be able to edit those files.
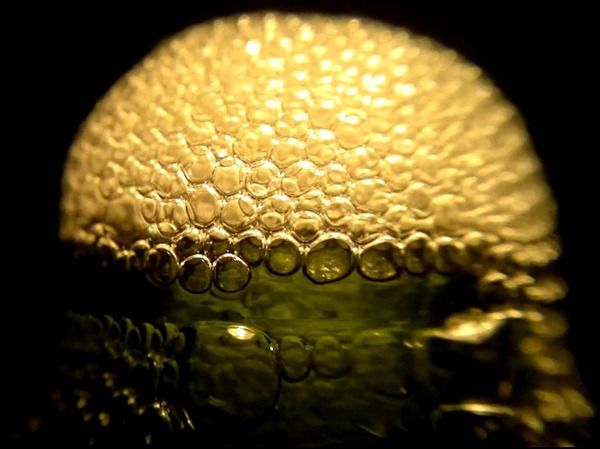


")

")

")

")
")


")